


So You Want to Make Wine from Grapes? Gather Your Courage (and Old Shoes!)
Let’s be honest: you’ve watched sideways, fallen for the romance of the vineyard, and now you look at your garden grapes and think, “Why not? How hard can it be?” Well, grab a glass (empty for now), dust off your sense of humor, and prepare for a journey that’s equal parts science, drama, and squishiness. Welcome to the world of homemade grape wine! You’ll need more than grapes and blind optimism—but let’s start with those.
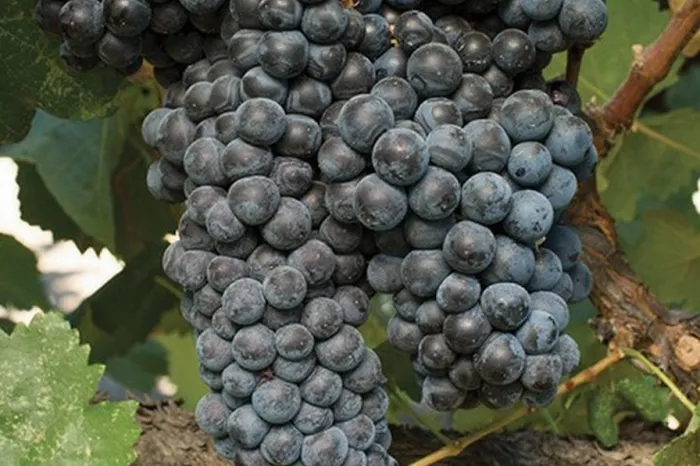
Grapes Aren’t Just Grapes: The Fruit of Fickle Fortune
First, the grapes. Are they ripe? Not too sweet, not too bitter, just right—like a fairytale but with more hydrometer readings. If your wine is going to taste good, the grapes should taste good. Don’t use the wrinkly ones from the bottom of the bucket unless you like your wine pre-aged… in a bad way. If you really want to get scientific, measure the sugar content with a hydrometer or a refractometer (bonus points for feeling like a mad scientist). You’re aiming for an SG between 1.070 and 1.100 or a brix of 18%-20%. If this means nothing to you, just taste and hope for the best, which is basically how winemakers survived before Google.
Essential Equipment: From Buckets to Beautiful Bottles
If you’re imagining yourself stomping grapes Lucy Ricardo–style, you’re not wrong, but be prepared for sticky feet. You’ll need:
- A large food-grade bucket (bonus if it’s been used for something less embarrassing than pickled herring)
- A lid with an airlock (so only your wine makes it out alive)
- A demijohn or carboy for secondary fermentation (bonus: impress guests with your fancy terminology)
- Syphon tubing for racking (so you don’t suck up the sediment, or what winemakers lovingly call “lees”)
- Steriliser or sodium metabisulphite (the only chemistry ingredient you’ll have on hand that’s not part of high school trauma)
- Mixing paddle or large spoon (wood is classy; plastic is practical; garden shovel is excessive…)
- Hydrometer (for people who actually measure things)
- Wine bottles and corks (or you could invest in a drinking-from-the-carboy culture, but neighbors may talk)
The Process: From Grape to Glory
Step 1: The Pick and Crush
Harvest grapes at peak ripeness. Remove stems, leaves, and anything that moves on its own. Wash well, then mash those grapes with great gusto (or gently, if bitterness isn’t your thing). For real authenticity, you can crush with your feet, but at least have the decency to wash them first. You want juice, not a footnote in history.
Step 2: Sanitise Like Your Life Depends On It
Unwanted bacteria are the enemy. Sanitize everything. If you skip this step, your wine might spoil, and then your hopes, dreams, and kitchen will smell like feet and regret.
Step 3: Test, Taste, and Sugar!
Use your hydrometer to check sugar levels. If you don’t have enough, add granulated sugar (not icing sugar unless you want sparkly wine). The higher the sugar, the higher the alcohol—so measure wisely unless you’re running a bootleg operation in your garden shed.
Step 4: Yeast of the Day
You could trust wild yeast and get unpredictable (aka “vintage”) flavors, or you could invest in wine yeast like Red Star Cote de Blanc for whites or a universal wine yeast for reds. Bread yeast is for bread. Repeat: BREAD yeast is for bread. Yeast nutrient or raisins can help the yeast along if you feel nurturing.
Step 5: Primary Fermentation—It’s Alive!
Add yeast to your must (crushed grapes + juice), cover loosely to keep out fruit flies (they love wine parties). Stir daily. For white grapes, strain out skins first; for reds, keep skins in for color and tannins. If you want rosé, strain skins after a couple days for that perfect pink.
Step 6: Secondary Fermentation—Bubble, Bubble, No Trouble
After about a week, strain (again, gently for clarity), then pour into your demijohn or carboy. Fit that airlock and watch for bubbling. Resist the urge to open things for at least a month unless you enjoy drinking unfinished wine—some do, but that’s between you and your palate.
Step 7: Rack Off (No Swearing Intended)
When the bubbling has stopped, rack the wine off the lees (sediment) into another clean vessel. Each time you do this, you’re helping your wine get clearer and tastier. Too much time on the lees, and your wine might taste like a forgotten loaf of bread.
Step 8: Sweeten, Adjust, and Clarify
Taste your wine. If it’s too dry or sharp, add a little sugar syrup (two parts sugar, one part boiled water), but remember: if you don’t want your wine to ferment again in the bottle (exploding corks are bad for insurance), add potassium sorbate and a last dash of sulfite. You can also “fine” your wine using clarifying agents—or just wait for gravity to do its thing.
Step 9: Bottle It Like a Boss
Siphon into bottles, leaving about 2.5 cm from the top. Secure corks with a corker—trying to push them in by hand is a good way to discover your grip strength (and how easily your hand cramps). Let bottles rest vertically for a few days before laying them sideways in your cellar, closet, or shoe rack (wine really doesn’t mind where it naps).
Step 10: The Agony of Waiting
Wine improves with age, so if you can resist opening the bottles for at least six months, your patience will be rewarded. If you try it after a few weeks and it tastes like grape-flavored regret, just wait longer. Or give it to your uncle: his palate peaked in 1973 anyway.
But Wait, There’s More: Red vs. White, Rose, and Other Marvels
Making red wine? Leave the skins in for more days for richer color. Want white? Press and filter your juice first. Rose? Just soak those skins for a couple days until you get classy blush vibes. If you want a “natural” wine, rely on wild yeast, skip additives, and take your lumps as a true pioneer. Modern kits make your first batch foolproof, but where’s the risky excitement in that?
Quick Recap: What You Need, Besides Grapes and Hope
- Grapes (as many as possible)
- Bucket, demijohn/carboy
- Airlock, tubing
- Sugar
- Wine yeast
- Steriliser (sodium metabisulphite)
- Hydrometer (optional for those not spiritually attuned to grape energies)
- Bottles, corks, corker
Final Words: Wine—The DIY Project That’s Fun, Messy, and Delicious
Making wine from grapes is the ultimate homegrown adventure. You need grapes, basic kitchen chemistry, some special gear, good hygiene, and loads of patience. Mistakes are part of the process—if all goes wrong, you’ve at least made wine vinegar (and character). So squish those grapes, cross your fingers, sterilise like you mean it, and don’t forget: always keep a glass ready for celebration (and critiquing your wine-making genius).
Cheers! May your wine be smooth, your feet clean, and your cellar forever mysterious.


